How to Adjust Disc Brakes

Your first bike with disc brakes is a big deal. It feels different; better modulation, better brake feedback, and better stopping power. It looks different; no clunky calipers in the way of your rack, no brake dust billowing over your bod, and no pads to eyeball at stoplights and say, "I ought to swap those when I get into work today".
But that novelty also means re-learning some bike tricks you thought you had down pat - like aligning your brake pads. In today's post we'll walk through a disc brake pad adjustment, so you can ride rub-free and stop with confidence. Let's jump in!
Where is Everything?
First things first, let's locate the brakes! With rim brakes your calipers used to live on the brake bolt just above your front wheel, but with discs the whole mechanism is moved down the fork and you'll find the caliper down by the dropouts (in the perfect spot to grab the rotor on the hub!).

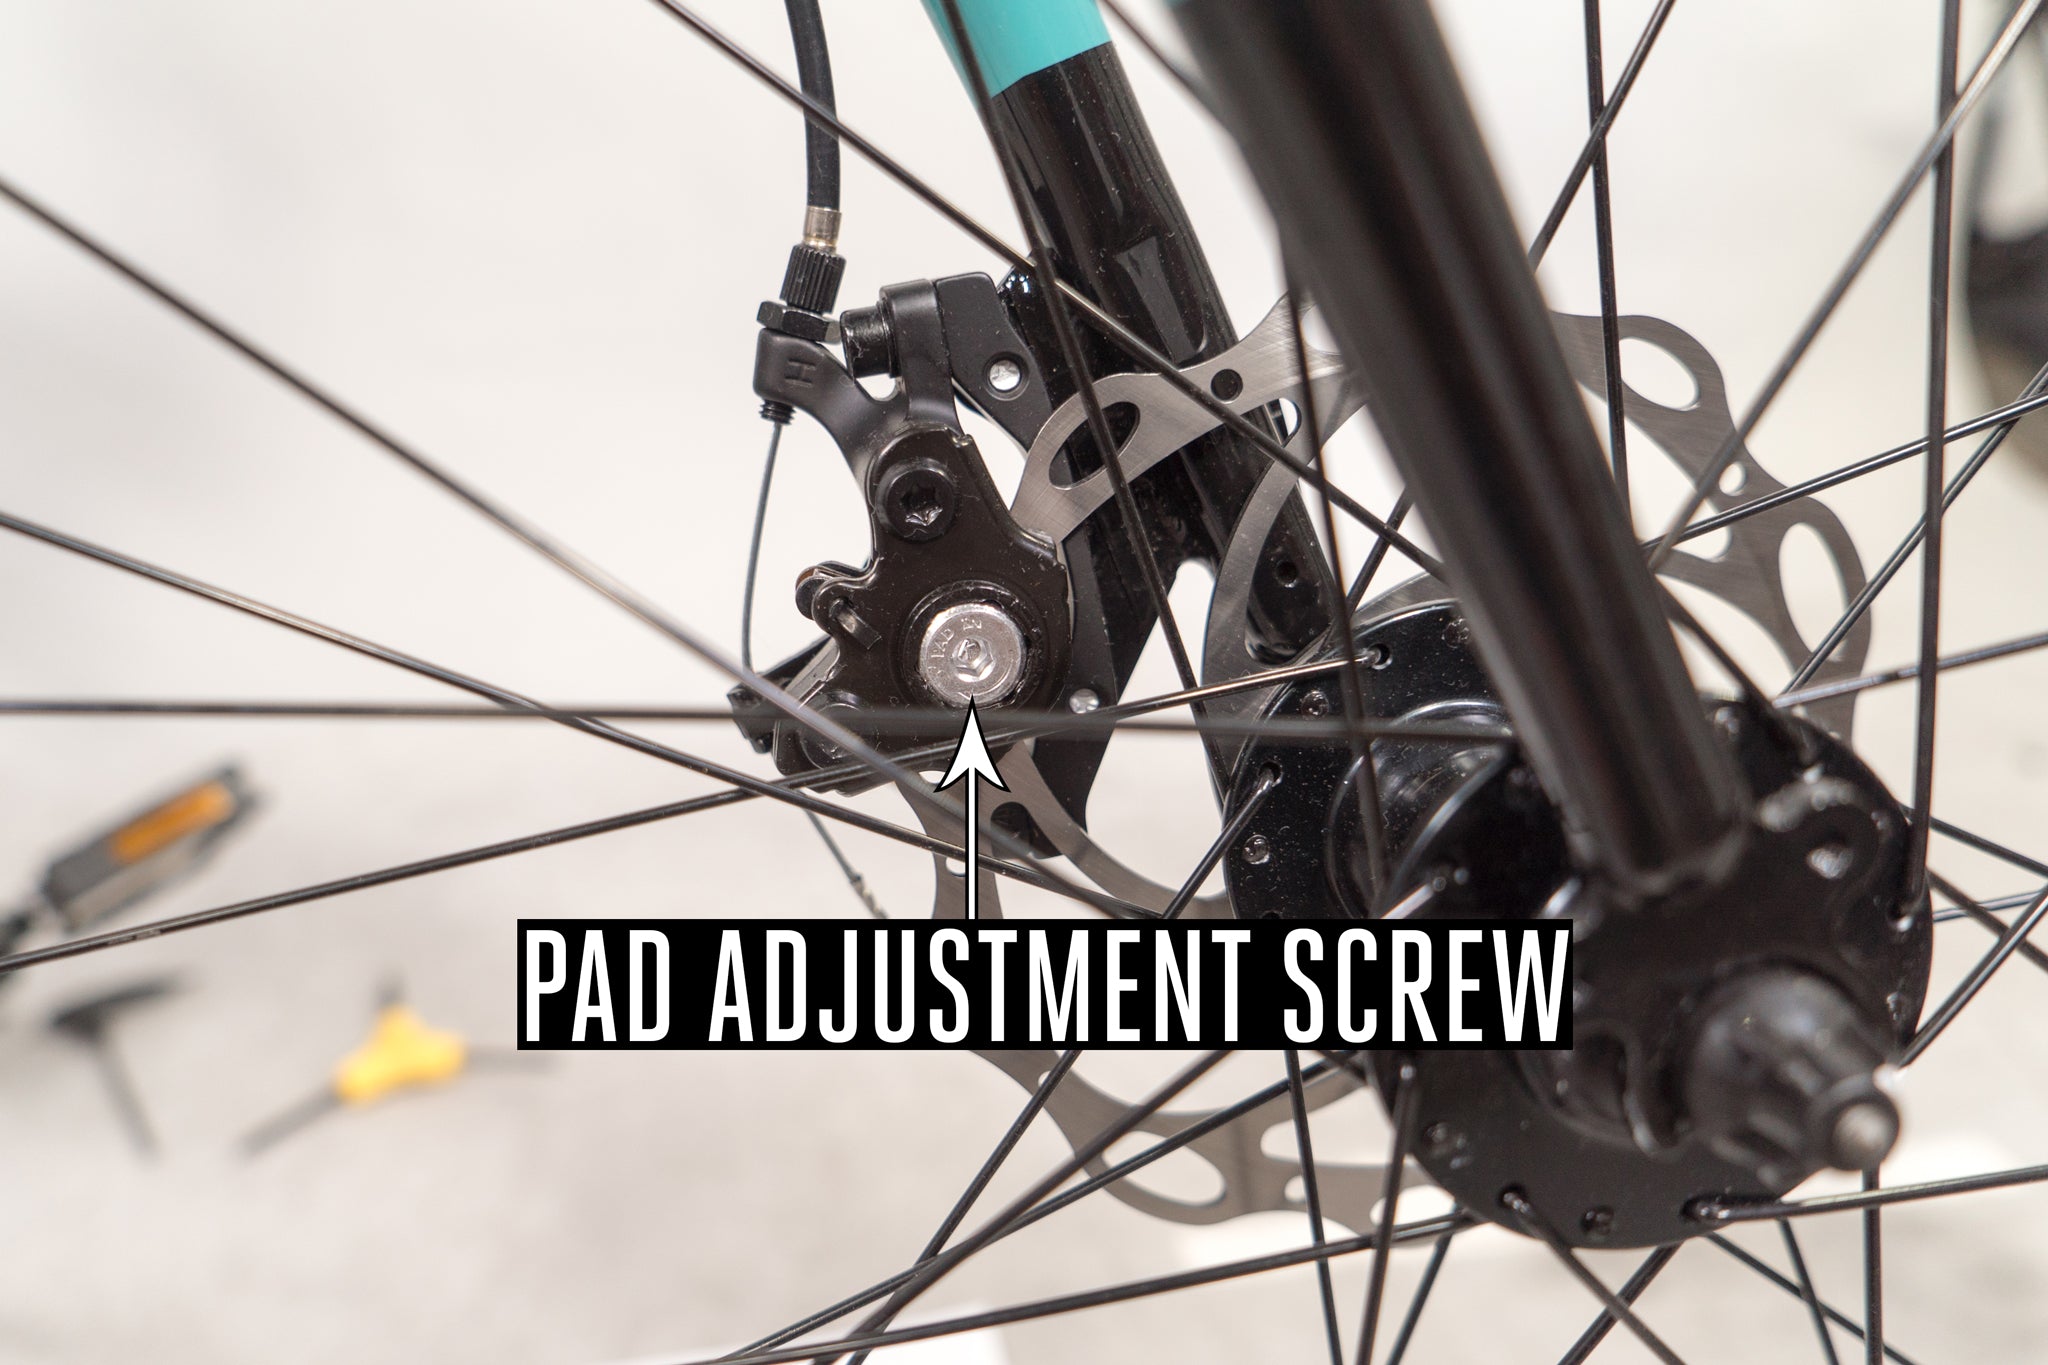
Let's label the important components so we can use some technical terms and all still be sure we're talking about the same stuff.

1 - Pad Adjustment Screw (same place on the opposite side too)
2 - Rotor
As for the pads, those are down, inside the caliper, and best viewed from directly above. If you have a hard time seeing them in relation to the rotor, stick a piece of paper under the wheel or pull your bike over a white surface to give you more contrast with the shadowy innards of the brakes.

Those brakes are in good shape, but let's say you just built your bike up and the brake pads are rubbing the rotor, sapping your performance and generally being no fun. In that case you'd see something like this.

Let's fix that!
What Do I Twist?
As you may have guessed, our primary tool for getting the pads adjusted is that "pad adjustment screw".
This one.
You'll notice there's a pad adjustment screw on both sides of the caliper, but one's hooked to the cable and actuated by pulling the brake lever. If you're building your bike new, the caliper's already installed and that pad should have all the clearance it needs - it's the "inside pad" that often hangs on a bit too tight (as seen in the above example) and so that's the one we'll need to adjust today.
For this, you'll need a 4mm allen wrench, the longer the better so you don't have to jam your knuckles into the spokes. Simply insert your wrench into the adjustment bolt, and twist counter-clockwise until you've got the clearance you need (the screw is labelled so turning it the "wrong" way shouldn't be an issue).

You'll feel a "click" with about every quarter rotation. Check your clearance after each click and you'll never go "too far".
The Goal
The goal is to make sure there's no brake rub and that the pads make solid contact when the brake lever's engaged.
Do your adjustments a bit a time, stopping to spin the wheel after each click of the adjustment screw to see if there's still a rub.


Once the wheel spins freely, you're nearly there! Now pull the brake lever to make sure the pads contact the rotor and the wheel stops.

And that's it! You've got your new disc brakes dialed in and you're ready to roll!

In the next disc brake post we'll talk mid-ownership tweaks and the adjustments you'll likely have to make after you've stacked some miles on your new bike. Happy riding, and we'll see you out there.