♬ Change, Change, Chains ♪
Whether you're giving your ride a style upgrade, swapping a worn chain for a fresh one, or stripping your frame to paint it, at some point you're going to want to remove/replace your chain. For some of you, it'll be the first time you've seen this:
That's right, the chain is mounted through the frame! Don't worry though, there are several good reasons to do it that way and, contrary to my childhood beliefs, you don't need to be a level twelve Bikeomancer to remove or replace the chain (it takes almost no real sorcery at all).
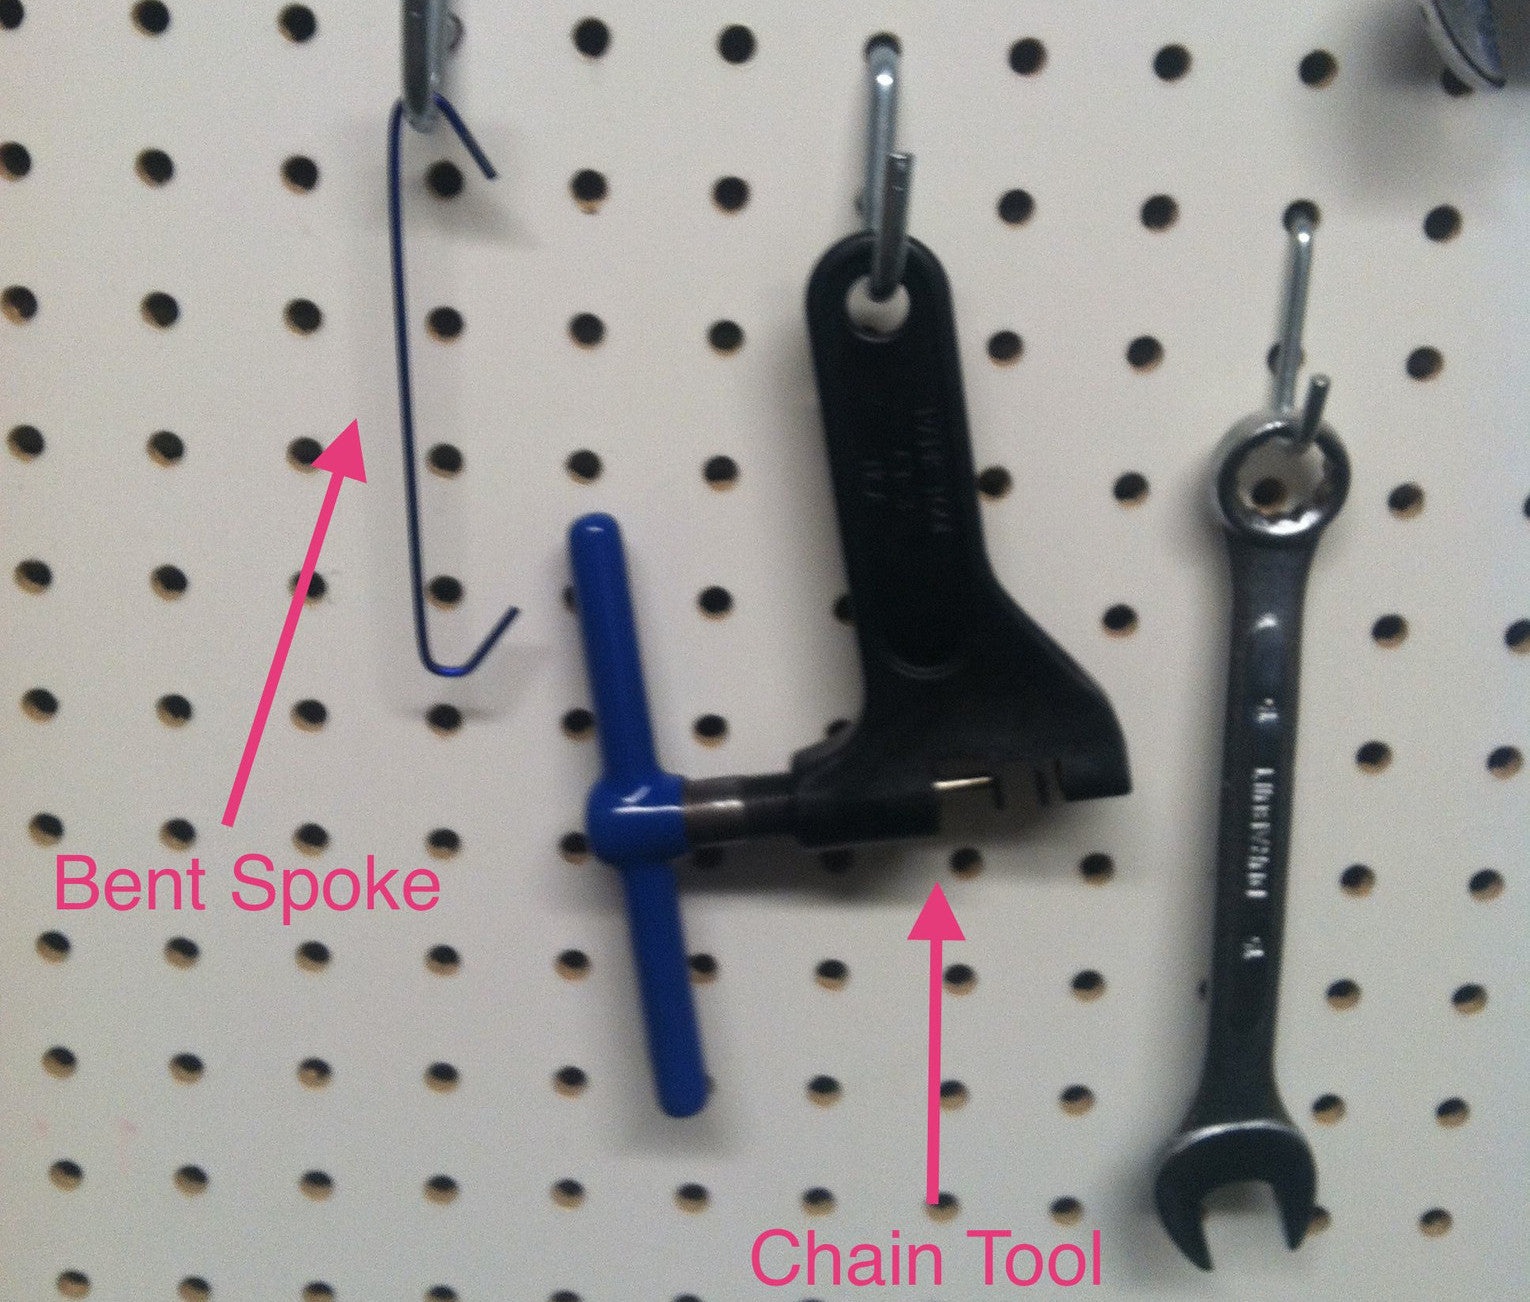
Here's what it does take:
- Chain Tool (we'll use the Park Tool CT-3)
- Bent Spoke (optional, but helpful when mounting a chain)
- Cold Beverage (also optional, but delicious)

And that's it!
I need to swap this old chain for a new one today, so I'll jump right in and you can follow along to learn how to do it yourself!
The first thing we'll need to do, after gathering our supplies, is to remove the old chain. A bike chain is composed of several plates (inner and outer) held together by pins. All we have to do is remove one of the pins, and we'll be able to pull the chain open.
The chain tool makes this super easy. Just set the chain into the rear groove on the tool (the side opposite the handle on our Park Tool CT-3) and the shape of the tool will hold the chain in place with one of the pins opposite the pushrod.


And now, just turn the handle to push the pin (almost all the way) out!
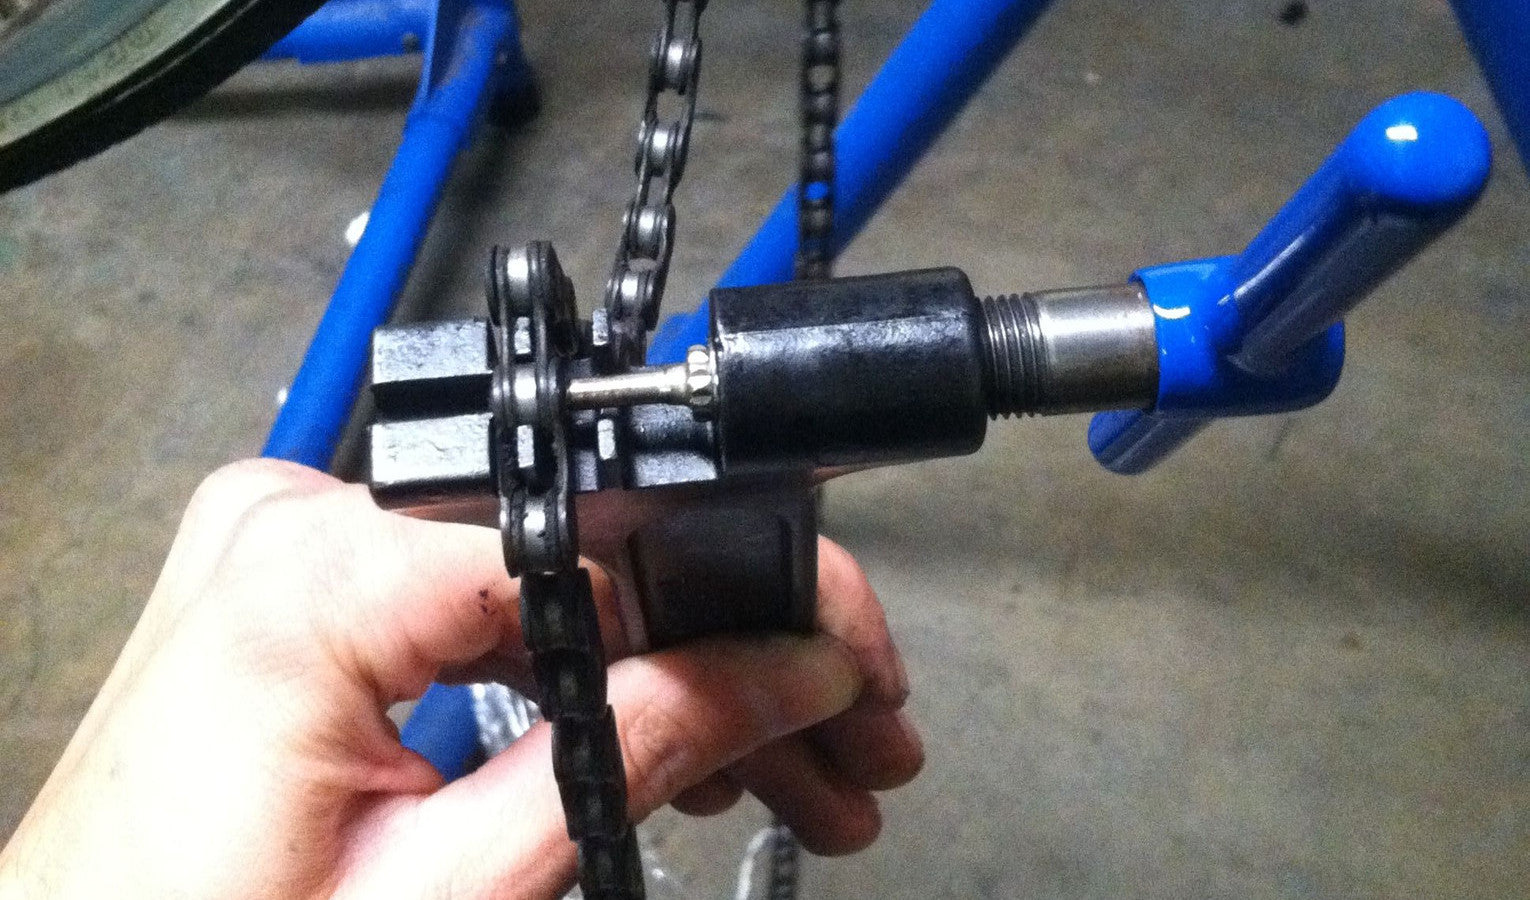
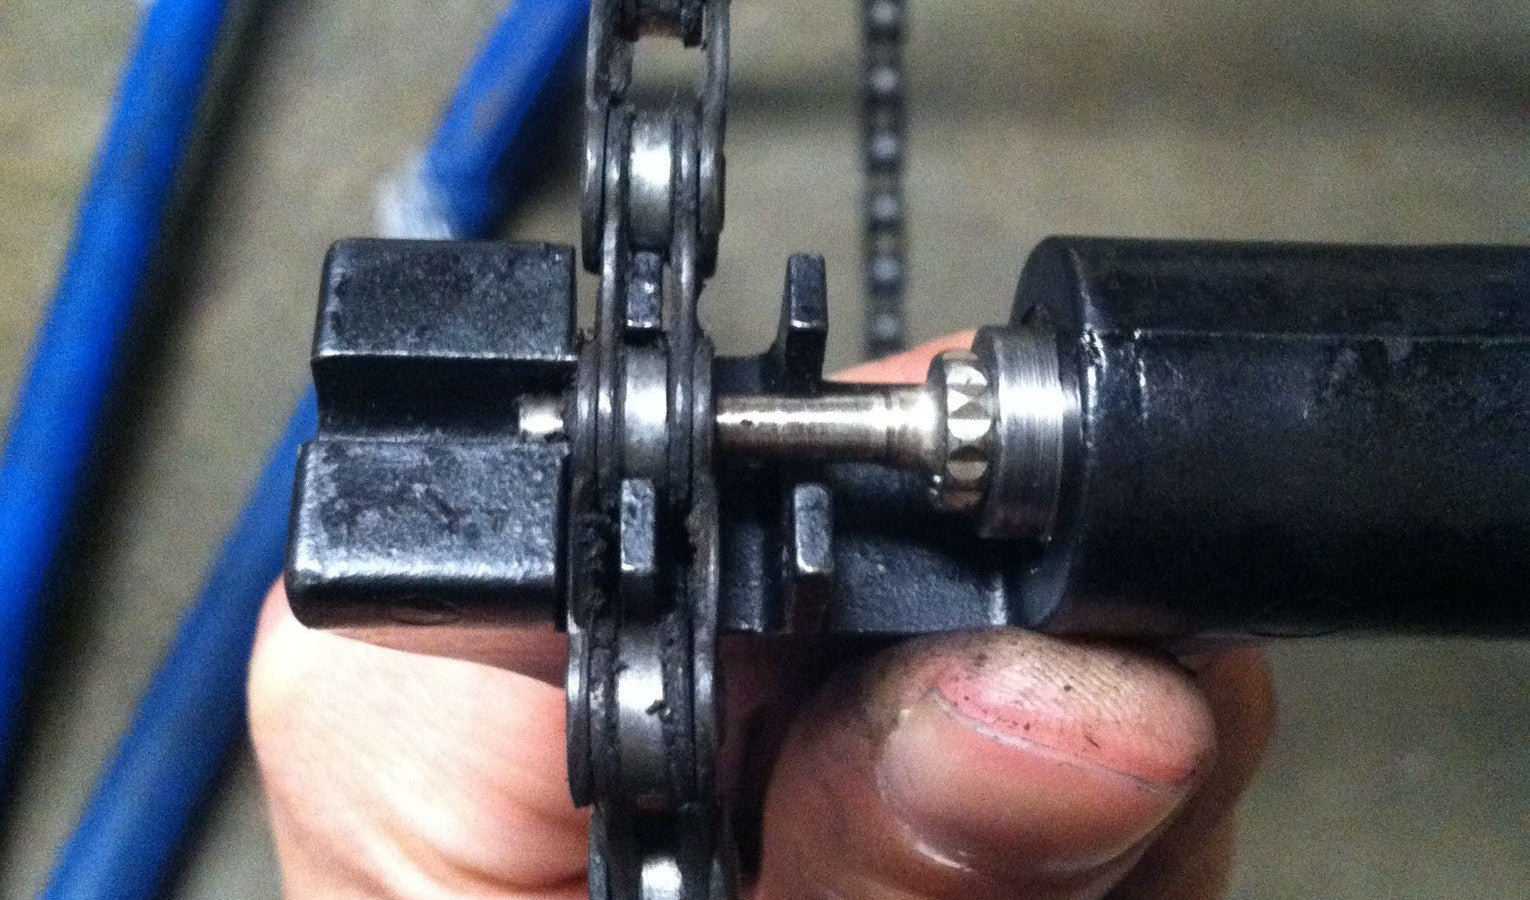
You want to stop before the pin falls all the way out of the back because it's pretty impossible to get back in, so, once you're close, alternate between giving the handle a quarter-turn, and trying to pull the chain apart by hand. Eventually it'll slide open and look like this:


Sweet! Now that the chain is off, let's pop a new one on there!
The first thing to do is lay your chain through the frame so you know it'll be in the right place once you close the loop. One way to do that is to lay the chain over the right chainstay, but I prefer to lay the chain on the cog and chainring so you can check your chain length at the same time.


Now, use that handy bent spoke to close the loop and hold everything in place for you while you work. You could probably use a bent paperclip or a piece of wire hanger too. 
Pull the chain closed to check if you have any extra links that ought to be removed to keep your chain tight. After checking, we can lose a couple links, so we'll use the same steps from above to push out the pin at the rear of the last link we'd like to remove.


Now that our chain is the right length, all we need to do is close the loop! Just slide the two ends of the chain together (one end will be narrower, so just wiggle it inside the wider end until they slide together and the holes in the plates line up with the pin).


Once it's all lined up, we'll use the chain tool to push the pin back into place. For this, be sure to use the same groove (furthest from the handle) that we used to remove the chain.
Tighten until the pin matches its neighbors. Each pin should protrude the same distance out of the chain. Out-of-alignment pins are a common cause of chain failure, so be sure to take your time and get the pin pressed in just the right amount. I usually have to go back and forth at least once because I'll push the pin slightly too far out the back. When that happens, just flip the tool around and press it back from the opposite side until it looks perfect.

Ta-da! You've got a new chain on your bike!
But we're not quite done yet. Sometimes the pin you just pressed in will squeeze the plates together giving you a "sticky" link. You want all your links to flow smoothly, so give the links a wiggle, and if you see something like this, you'll want to smooth it out.

To do that, we'll use our trusty chain tool again, but this time drop the chain through the groove closest the handle (finally).
It won't take much, so just give the pin a little nudge with some small turns of the handle and it should free that link right up! (Also, double check that you didn't push the pin out of alignment, and if you did, just turn the tool around and push the pin back so it again sticks out as far as its neighbors on both sides).
Perfect! Now you're all re-chained! All that's left to do is adjust your rear wheel until you have the tension you want (you want about an inch of play in the chain, so half an inch of play up and half an inch of play down from its resting position).


And you're done! If it's a new chain, it'll have that awesome factory lube on there, so you'll be good to go! If you're using an old chain, give it a good wash before you re-attach it, and be sure to use your favorite chain oil/grease/wax before you ride!
Woohoo!